Friday, April 27, 2012

Air Dry Clay Review : Martha Stewart Air Dry Clay


Thanks to a sale which my aunt informed me about, I managed to grab a pack of Martha Stewart Air Dry Clay as I was really curious to try out its texture. If not for the sale, I probably would not have gotten this as I think it is rather costly in my opinion.

Looking at its texture just from the packet, to be honest, I really can't expect it to perform like resin clay. But I was really curious to know how does it performs compared to the other air dry clays.

I have a feeling that this clay is targeted for scrapbooking enthusiasts who wants to make flatback embellishments to further accessorize their scrapbook. There are quite a few reviews out there with that purpose in mind, so my review is probably more targeted for deco sweets makers who might want to know how this clay works compared to other air dry clay.

Texture

When I took it out from the packaging, my first impression of this clay was - it was FRESH and definitely very wet. It was probably the wettest air dry clay I've touched in my life. ;)

Just wanted to show how the Martha Stewart Clay looks like fresh out from the packaging...

 I think the closest comparison to this clay would be Hearty Clay. It feels the same to me, so I decided to compare them side by side.


Is crumbly good? It all depends on what you want to make. No matter how I press the Martha Stewart Clay, the edges doesn't fray out and crumble slightly like how Hearty Clay does.

One thing about the Martha Stewart Clay is, even if it is very wet,  when you try to roll a round shape between your palms, you might not get a very smooth crack-free ball.

TIPS

If you are using the Martha Stewart Clay with molds, perhaps you might want to smooth out a larger surface area of the clay first to make sure there are no cracks on it before you press it into the mold. This is a better method than inserting a round shape into the mold and pressing it down. Cracks, lines, whatever you call it - should be eliminated this way. 

I actually tried the way I described above with a mold, and that worked for me. I did not see any cracks when I release the clay from the mold.

Towards the end of this review, I am going to show you my failed result when I did not do what I described in one of my earlier experimentation with Martha Stewart Air Dry Clay.

But first, I also wanted to show you another texture comparison between Daiso Clay and Martha Stewart Air Dry Clay so you have a better idea.


Molds are just one way to use this air dry clay, but what I was really interested in, was how the texture really is when I sculpt a more challenging item such as a macaron since it involves more than just popping the clay out of a mold.


Having used other clays to create the fake macarons with the ball method to get the clay into the mold had always worked for me....so naturally I would think that it would work with the Martha Stewart Clay as well.


 See the crack/lines in my experiment


The reason why I would not sculpt macarons with Martha Stewart Clay is NOT because of the cracks and lines, but purely because of how much time it takes me to texturize the feet of the macarons. It's just not the  ideal clay for me to get the most natural effect that I want.

When dried, the Martha Stewart Clay is very lightweight, and flexible. (Think Hearty Clay). You can twist it, so don't expect it to dry to a rock hard finish.

Right now, I shall probably just use this as a Hearty Clay substitute till I find a way to use it for something else. :)

Monday, April 23, 2012

The Art of Making Fake Macarons

I'm not an expert in the art of making fake macarons, but I definitely keep trying to improve my art. I still recall the first time I tried my hand on making the life size macaron was probably sometime last year, and I was nervous as I don't use that much clay at one go creating something. But I was really happy I started because it opened up another world for me :)


As I went on creating macaron after macaron, I gathered some knowledge and I would do a few refinements every time I try making them as I think that's how I know what worked or didn't work for me.

Colour

Pay attention to the colour. The best thing about macarons is they come easily in many shades and colours, so you can almost replicate a colour or shade easily without much difficulty. But the real challenge would be, can you stick to the same colour consistency for the X amount of macarons you are making? That should be something to think about.

Points to consider:
1. If you are making them in bulk, how do you keep the colour consistency so that the whole batch looks the same? (Maybe this wouldn't be your consideration if you are only make one piece, but if you are trying to build a macaron tower, then you might want to think about this.)

2. Do you want to mix them all first before creating? Then again, what kind of clay are you using to make them? 


Gloss

The macarons that I've seen in real life looks moist or semi glossy, so before you actually gloss it, consider the amount you are going to use. Everything in moderation :)


Smooth or Dappled

I don't remember seeing smooth macaron shells in real life - again I'm using my own real life experiences when creating the fake macarons. There are smooth shells out there, but this depends on your personal preference. 


These are the things I think about when I create life size fake macarons, and I hope for those of you who would like to give a try creating fake macarons - hopefully they give you something to think about before you start, so you can be more successful in your attempts. 

Have fun making them!


Friday, April 20, 2012

Shopping for Ranunculus in Singapore

I like going for walks, especially to places where I can admire green plants and flowers. Couple of weeks ago, I decided to pick a new spot to go to - and I wondered why I never ventured there before...but people's likes and interests do change overtime. The presence of plants and flowers is important to me, and I decided to take an exploratory trip.

Now that I figured that it takes only 1 straight bus for me to get to this wonderful place, there is no reason NOT to go again sometime ;)

There are a couple of wholesale flower nurseries locally, and flowers are stored in cold room. It's a big cold room, so people can walk in and pick their own flowers. I went to all the flower nurseries and the first time I walked into one, I was probably like a kid in a candy store. There are ferns, leaves of all kinds, and of course the flower section....

Roses are sold in bulk, I think at least 10 stalks at a go. Obviously they are so much cheaper than what you would find in florist shops! And there is a wide variety of colours for you to pick. I honestly did not know that these shades existed because most local florist shops would only carry the traditional colours that can get a bit boring....you can find various shades of pink, even vintage pink!

Unfortunately not all the flower nurseries allow photography, so I only manage to take a few shots in the cold room of the room that I'm allowed to.

The staff at Candy Floriculture are the most friendly and nice in my opinion, so you may ask them first if you can take photos :)


These yellow carnations are also lovely to look at! 


 These flowers are very fragrant and so lovely to look at!


I also took a walk looking at the outdoor plants on sale.  Everything is nicely arranged. I'll let the photos do the talking :)


I had fun smelling and looking at the different flowers in the cold room. When I finally spotted the ranunculus I was looking for, I had to take a couple of photographs right away. Candy Floriculture has really friendly staff.


There were also orange ones, but the photo didn't turn out well due to the low lights. This particular bunch is a mix of several different colour ranunculus.


Have a happy weekend!

Wednesday, April 18, 2012

Searching for Ranunculus

(This post is non-miniatures related)

I bought a bunch of ranunculus last weekend...I couldn't resist! The flowers bought at the wholesale flower nursery is so much cheaper than what you would get at any florist store, so it just made sense. I got a whole bunch for $12.

Will be blogging more about my flower shopping trip in the next post...

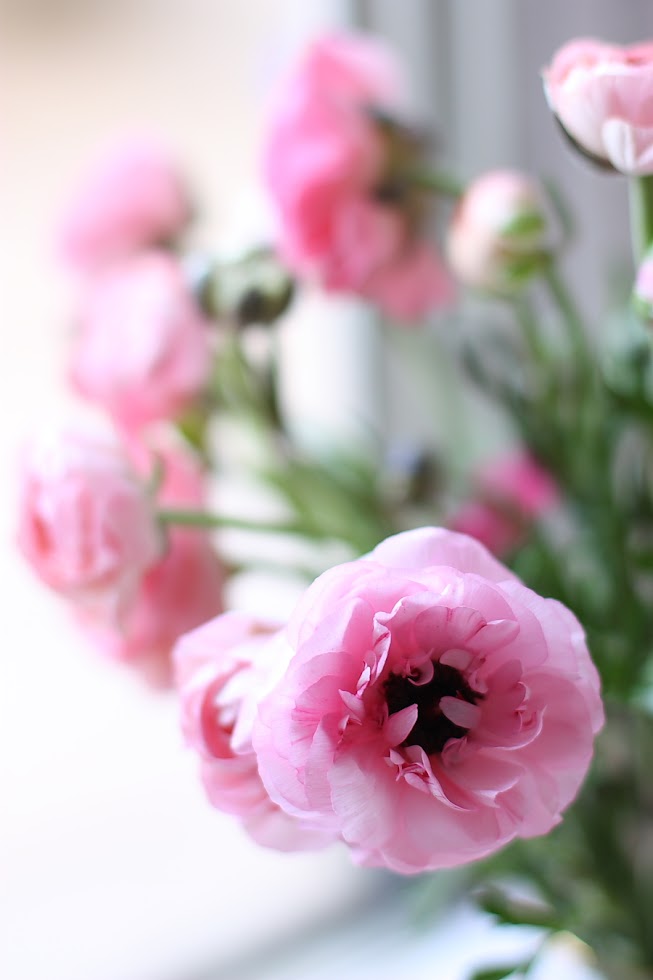
But for now, I wanted to share some photos of the bunch of ranunculus I bought.
There were another bunch in orange which was lovely too, but this bunch of pink ranunculus caught my eye.
I was just mesmerized by their different shades of pink!

They looked small when I just bought them, but they do open up quite large! As the days go by, the colour would start to fade a little too.


I filled up the little vase for my room, and could only put in 3 stalks :) So pretty to look at!
For the rest of the flowers, I put them in another bigger vase and display them in the living room.


Here's another shot

Have a great week everyone!

Monday, April 16, 2012

Building My Own Dollhouse Window Part 2

I finally had some time last week to continue with my roombox. Back then in my first post, I had finished with how the window frame would look outside the roombox. I have since finished with the window frame in the roombox too and after much thinking, I finally picked up my paintbrush and painted it!

I decided to go with the antique brown colour as it matches my wallpaper very much.

Here's a glimpse of how it looks from inside

There is still some work done for the window treatment but I will leave it aside right now as I move onto the other components in the room box itself! 

Part by part, I hope to be able to complete it by this year :)

Saturday, April 14, 2012

Life Size Fake Macarons

Before I go about preparing for my workshop in the afternoon, I just wanted to share a couple of photographs I took this morning.

I had a request to sculpt life size fake macarons much to my delight! Interestingly my customer picked white coloured macarons. This is my first time making something sooooo purely white. :) It made me smile as I'm so fond of white too.

I studied the photo for some time and decided it was actually a buttery, warm white, so I created a similar colour close to the real photo.

I started making them yesterday, and only managed a couple of shells....
I will be making more tonight, and later this week...

Meanwhile, I whipped out my camera to take a few photos to show my customer a few photos. I always love showing them the exact colour they are getting, and my progress. I'm so glad she loves it!

I am always curious to find out how, where my creations would be used, especially for these life size fake macarons...so I asked and my customer said the real ones never lasted long enough, and she figured these would make such wonderful home decor purposes. She had a cake stand where she wanted to display these in her kitchen! Can't wait to see it!!


White macaron against the blue sky!


No cream in the middle yet!

Have a happy weekend everyone!

Thursday, April 12, 2012

Air Dry Clay Industry News!

While shopping with my aunt after our family lunch last week, we went to the local scrapbook stores and lo and behold, I saw that even Martha Stewart has released her own brand of air dry clay.

This must be fairly new, as I have window shopped at the local stores every now and then (even though I don't buy very much), but I have never seen this. She has her own line of craft glues, glitter powder, punchers etc, but this is the first time I see air dry clay.

This air dry clay, along with other silicone molds are parked under New Products in their website, so I suppose they are indeed new! On the website, they are actually called Crafter's Clay White Clay.

I was quite tempted to buy a pack to try, but the price of it made me think twice. For a packet (there is only 1 size, 68 grams), it is retailing at S$11.90. It's twice more expensive than Hearty Clay which, in my opinion is already a very good quality air dry clay.

I decided not to get it this time round....maybe later I will. I'm actually quite curious about its texture and quality.

Although there is another pack that comes with 4 primary colours of air dry clay, I don't see it in the local stores yet.

 Photo credits: Martha Stewart Crafts

For you all crafters, I suppose this is still an exciting news as there's now another brand that you can add to your list of air dry clay brands now. 


Wednesday, April 11, 2012

Dollhouse Miniature Rose Peony Cake

I haven't been making dollhouse miniature cakes lately....as I had been spending a lot of my spare time experimenting flowers ;)

But this was just one of those things that I always wanted to do - it was a matter of sitting down and getting it done!

Things in real life always inspire me, and this is just one of those. After seeing a similar photo of a peony cake, I was just mesmerized with the gum paste cake.

Layers and layers of ruffles kept appearing in my mind....

The style that I've used in making the peony for cakes is also a tad different from making dollhouse miniature peonies. This flower is almost opened to a full bloom.

I am liking this a lot, and is such a delight to look at...

I hope you like it too! :)


Monday, April 9, 2012

Dollhouse Miniature Flowers - Orange Ranunculus in 1:12 Dollhouse Miniature Scale

I'm thrilled to have a few peaceful moments last week to indulge in making some dollhouse miniatures flowers. This project is something that I've meant to do a little while ago.

I was extremely excited when I received the photos of the shades of flowers as a colour reference before I started creating them. When I saw them, I knew they were just totally me. (Although everyone who has been following my blog would probably know I've never attempted orange coloured flowers)

Everything spells soft and subtle in this. Even orange can be that.

One of the best things for me is whenever I can experiment new shades and colours. I also had a chance to refined my process and ways of doing things in this project.

These new orange ranunculus is the result of that. :)

I love the light, almost there green peeking out in the center, and how the gradient shades of orange flows out.

Hopefully they make you smile!


Wednesday, April 4, 2012

Food Jewelry - Wear a Present Ring

I made this food jewelry, named Wear a Present Ring a little while ago...

I got the inspiration when I saw a real version of it being made into wedding cookies, and I thought why not adapting it into a ring?

I made the cookie base, and had fun using air dry clay to replicate gum paste. To top it off, I added a pearl onto it :)

The colour is truly my favourite, it makes me smile and I hope you will too!